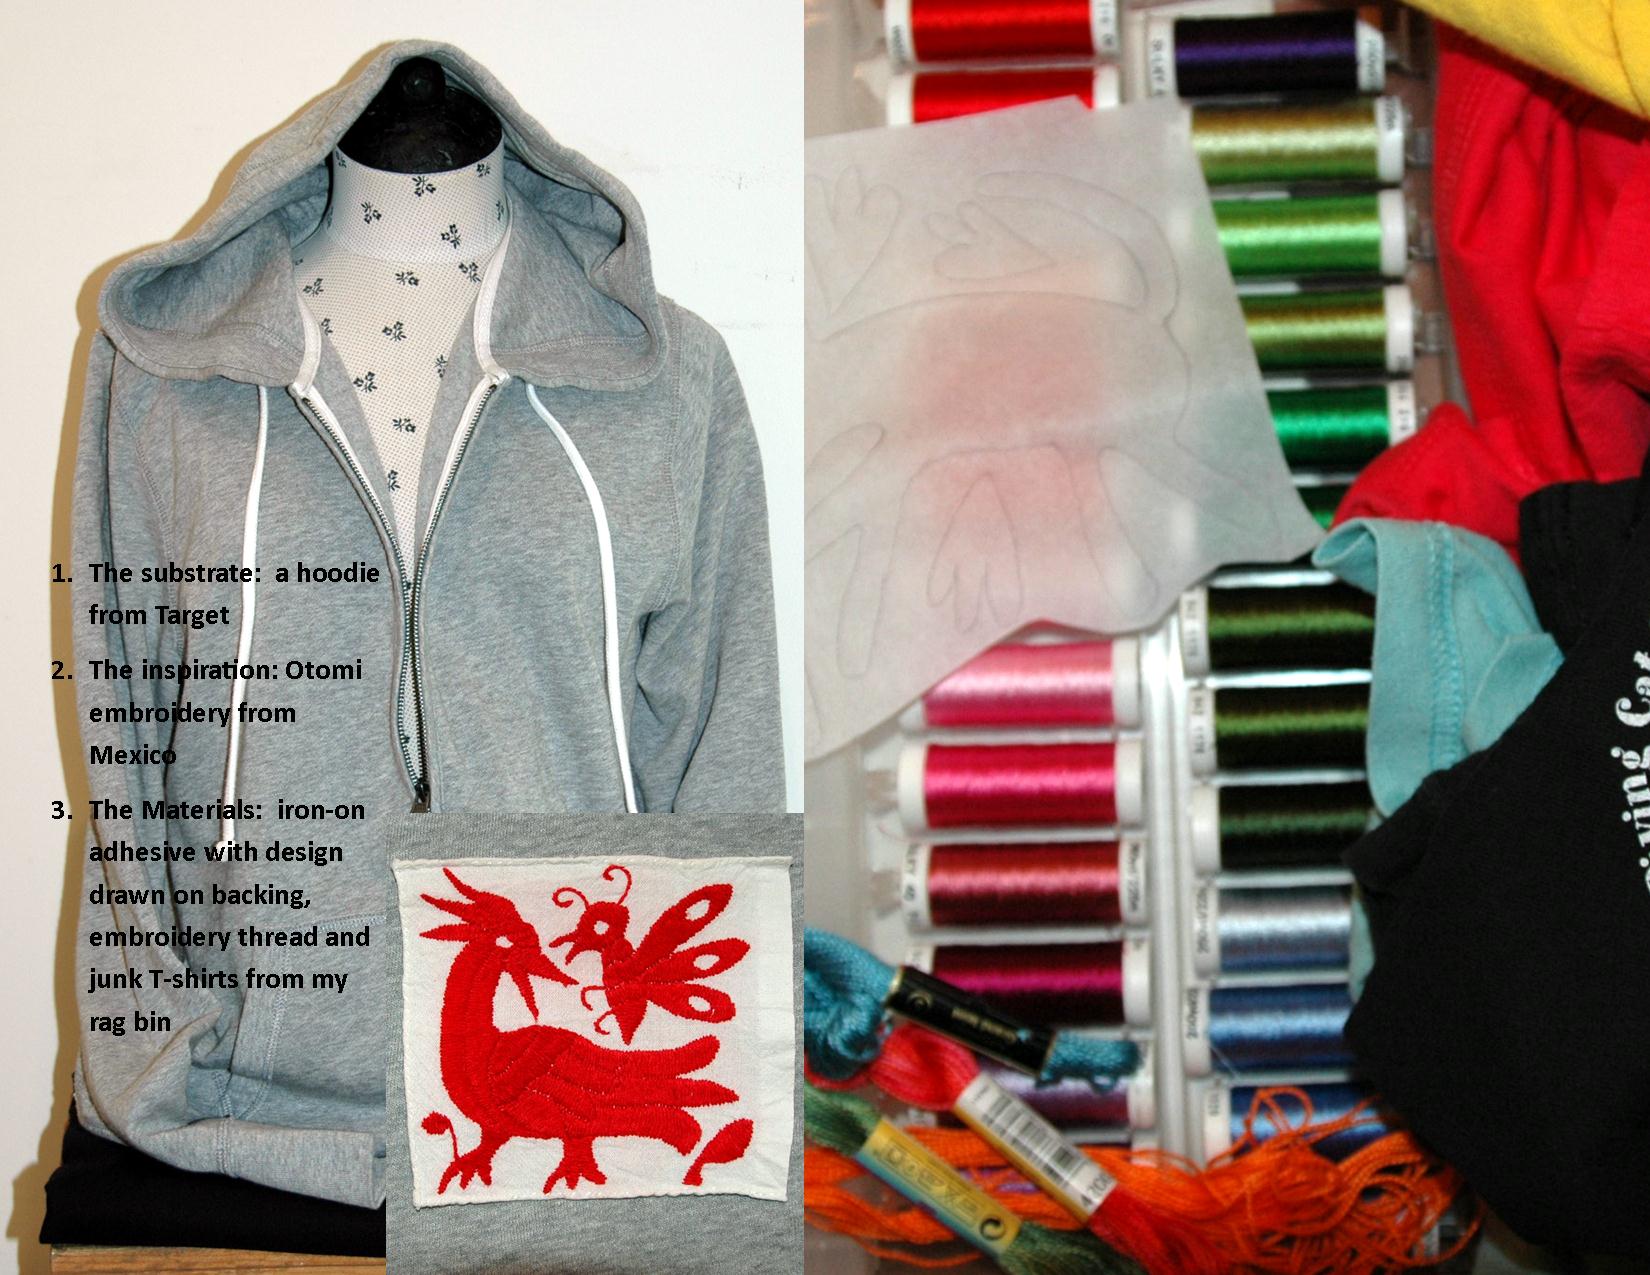
I like to make clothes, but don’t always have the time to devote to constructing an entire garment. While strolling through Target the other day I decided to pick up a couple of “bare canvases” to create some fun re-dos. These are quick, easy, projects that can transform a ready to wear garment into something a little more. After purchasing the two tops, I challenged myself to make something out of them using only what supplies I had on-hand. Keep in mind that as an artist & hard-core supply hoarder, I have A LOT of supplies on hand! The possibilities are endless and you certainly do not need to purchase brand-new clothing to re-do. Thrift store finds & “deep storage” oldies make the re-do into a recycle!
I did need to purchase some fusible web adhesive. This is a great tool for beginner & advanced sewers alike. The adhesive is sold with a paper backing on which you can draw (or even trace) design elements which can then be appliqued onto something else. You iron your drawn designed onto the designed fabric, cut it out, remove the paper backing & then iron it onto your “base” fabric or the garment. Beginners can start by using t-shirt jersey knit material. This fabric is almost fail proof because it does not fray after washing. Using woven fabric requires a little bit more forethought because raw edges will unravel when washed. A densely-stitched zigzag around the entire boarder of an applique and the use of “fray check” can prevent fraying, but that takes a looong-time and not what I wanted for today’s project. For one my projects I wanted frayed edges on the appliques as an element of my “re-do” design aesthetic.
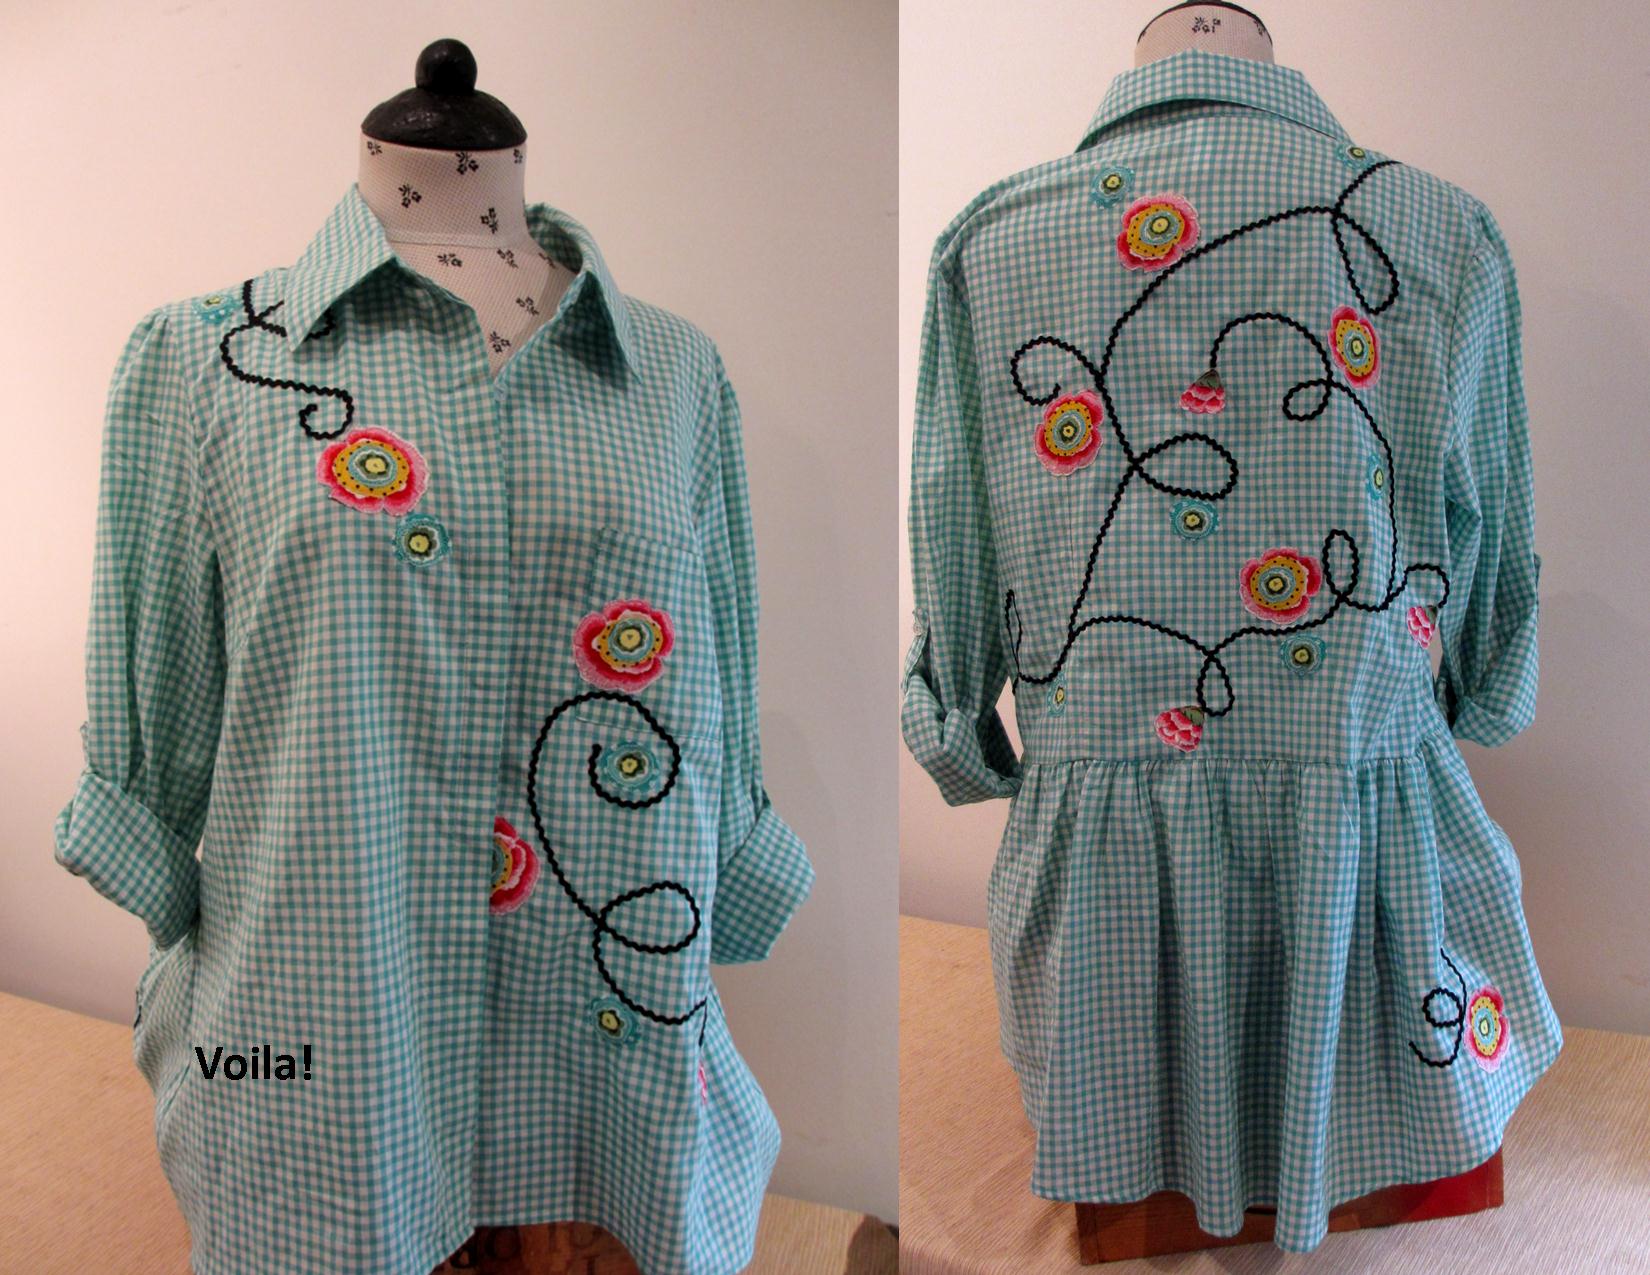
I used free-motion sewing so that I could stitch loosely & freely without having to constantly stop & turn fabric. Free-motion sewing allows you to move the fabric in any direction while the machine is running. The benefit of this is that you can more easily “draw” with your stitching lines & create free-flowing lines, like you would if drawing with a pencil. This technique gave me the
“folksy” look that I wanted as you can see my child-like doodle-y stitching lines in the photos below. The downside to the free-motion technique is that it requires a special pressure foot ( mine cost $22) & some practice to achieve “flow-iness” and an even stitch length. The stitch length is now controlled by you & not regulated by the machine. The speed of your hand movement must be timed just right with the speed at which the machine is operating to get an attractive & effective stitch length. Bernina now makes a “stitch regulator” for newer model machines. This gadget allows you to do free-motion sewing with perfectly even length stitches. I thought about purchasing one for my machine, but at a price of $600 (!) I decided I could live with my wonky stitches.
To use the free-motion foot you drop the feed dogs. As you begin to sew you will quickly notice that the fabric isn’t being pulled-through the machine like you are used to….. because YOU are now acting as the feed dog. Even though the free-motion foot does not apply pressure to the fabric, you still need to lower the presser foot or the machine will not link top & bobbin threads correctly & you will have a mess on your hands. You cannot do free-motion sewing without this foot attachment .
So here are my two quick & dirty projects. I chose a comfy hoodie to embellish & a flirty gingham blouse. What do you think?